On the cruise ship Discovery Princess, you can count on delicious salads, starters, entrees and yes, the desserts. And some days a light breakfast of almond croissants fresh from the oven or my Brie croissant sandwich with arugula, orange marmalade and toasted walnuts. Chef’s kiss!
When I received my box on Tuesday this week I was disappointed to see that the two entrees I received were not the ones I selected. The good news was two-fold 1) the ones they sent were meals that looked delicious and 2) when I called, they immediately applied a credit to my next order. I offered to send photos and it was not necessary. An email arrived within minutes apologizing and documenting their resolution. I couldn’t ask for more.
Especially now that I’ve had both meals – absolutely loved them.
The first one I fixed the day I got the box. Although I’ve enjoyed some pretty spectacular burgers in my lifetime, it would be easy to say this might have been the best one ever.
The Melty Monterey Jack Burger with Red Onion Jam and Breaded Zucchini. Seriously. This burger rocked my world.
Tonight I fixed the Sweet as Honey Chicken with Green Beans and Jasmine Rice. And again, I had a meal that was delicious and flavorful but also it was one of two 540 calorie meals that were offered for this week which was a nice benefit (others being higher in calories but still balanced and healthy). If I’d had this in a restaurant I would have sent my regards to the chef. As it was, I patted myself on the back.
So far, I’m a fan of HelloFresh and with each new box, I feel certain that my positive experiences will continue.
This blog represents my opinions and enthusiasm but no compensation from HelloFresh. From inception I didn’t want to have advertisements on my blog, (no judgements) simply my preference.
So I’m having my mom over for dinner today and along with my famous rotisserie chicken, I wanted to create a new side dish. Since Spence turned my mom onto sweet potatoes, she’s become a huge fan (as have I) and I came up with this idea. This would also be a nice way to change up left-over baked sweet potatoes.
Sweet Potato Brûlée serves 2-4
2 sweet potatoes
nutmeg
orange zest
sea salt
2 t brown sugar
Bake the sweet potatoes after rubbing the skin with olive oil and salt at 350 degrees for 40 minutes. Allow them to cool then slice them in half and using a soup spoon, scoop out the flesh (as intact as possible) and place into a buttered baking dish.
Using a microplane, dust the potatoes with nutmeg (to taste). Using the microplane again, zest the orange over the top of the potatoes (to taste). Sprinkle with sea salt. Crumble the brown sugar so it is fine, no clumps, then sprinkle lightly over the potatoes.
Preheat the broiler, placing these on the next to top rack for a few minutes, keeping an eye on them so they don’t burn. When the top looks bubbly and like a brûlée remove from over and rest for five minutes, then enjoy!
For this next installment, as promised, I’m going to talk about the daily breakfast included with our stay at Bucuti and Tara Beach Resort. Spence teases me about photographing my food when I travel “Laura’s Eating and Drinking Vacation Diary” as he calls it. But come on, if you’re a foodie it makes sense!
At home, I’m lucky if I can get Spence to have the occasional yogurt for breakfast. He just isn’t a breakfast guy – until we get to Bucuti.
Serving till 11:00, we stroll down around 10:00, are greeted by Martin who seats us (we prefer inside). Then comes the decisions – what to choose?
eggs to order – Nancy or Marjorie (depending on the day) will prepare eggs expertly including omelets – a favorite of Spence’s
Bacon and sausage
Potatoes – different varieties each day
Specialty items that change daily – some of which were eggs benedict, arepas, red beans and rice, empanadas style meat filled little goodies were among my favorites
4 kinds of juice plus fruit or veggie infused water
2 -3 kinds of meat – ham, pastrami, mortadella to name a few and 2-3 kinds of cheeses – always including gouda
smoked salmon or smoked trout with cream cheese, onions and capers
fresh fruit platters – multiple varieties each day including: pineapple, papaya, watermelon, cantelope, honeydew, mango, dragon fruit and passion fruit as well as bananas, apples, kiwi and orange on the other side of the buffet
easily eight types of bread as well as pastries, croissants, bagels, english muffins, banana bread and pound cake with an assortment of jams, spreads and butter
Yogurt and topping of granola, dried fruits
Cereals (3-4 varieties)
I’ve probably forgotten something but I think you get the drift. Amazing. This year I got to try dragon and passion fruit, both of which I’m totally smitten. Succulent, perfectly fresh and delicious, I had to stop short of gorging on these, such a treat. With attentive, friendly service from Nakarid, Ricardo and Lina, it is the best way to start each day when staying at Bucuti and Tara Beach Resort.
Eggs Benedict, Bacon and Papaya
Eggs, Raisin Toast, Dragon and Passion Fruit, Bacon and Pink Grapefruit Juice
Mango, Pineapple, Dragon Fruit, Hardboiled Egg, Cinnamon Roll and Pink Grapefruit Juice
Papaya, Roasted Potatoes, Pineapple, Cinnamon Roll & Eggs Benedict
Arepa, Dragon and Passion Fruit, Papaya and Pink Grapefruit Juice
The splendor of Passion and Dragon Fruits
The inside of a Passion Fruit, I found it easiest to eat with a fork and the seeds and flesh just lift out. The seeds are edible in both Dragon and Passion fruit. Now the challenge, can I find these in Michigan? I hope so!
Though I featured this post one year ago, it remains one of my signature recipes and one that we are having again tonight while ringing in 2016. It’s a tradition but also, it’s an amazing and delicious dish and so here it is once again! I hope you’ll try it!
Happy New Year!
Spence and I have spent 24 New Year’s Eves together. At some point I came across this recipe that sounded decadent, festive and delicious. The first few New Year’s Eves I made this as an appetizer/first course, then onto lobster tails and maybe even fondue as the night progressed. Too much food, too rich and the star here was the Scallops Chambord. Fast forward, our holiday routine now firmly established, Scallops Chambord is the whole meal! This year I prepped 4 skewers but decided to prepare two of them first, then about an hour later, two more. This was brilliant as we savored them over the evening with a fire blazing, Prosecco and later a special bottle of Champagne. I use most cookbooks as a “guide” so this represents my version which is better than the original in my humble opinion (patting myself on the back now).
Scallops Chambord
20-24 sea scallops
5-6 slices of bacon (not thick cut)
Rinse the scallops and rest on paper towels, blot the top. Stretch the 5-6 pieces of bacon, just pulling gently to lengthen. Cut each slice in half. Prepare a broiler pan and four skewers. Wrap the bacon around each scallop so that there is a complete wrap with a little overlap. Thread onto skewers, keeping space in between them. Set aside.
Ingredients for the sauce
Regular Cut Bacon
Sea Scallops prepped
Chambord Sauce
1 c seedless black raspberry preserves
1/4 c honey
1/4 c Chambord liqueur
In a small saucepan, add the preserves, honey and Chambord liqueur. Stir together on a very low heat to melt the preserves and honey together and incorporate the Chambord. You’ll want it to reduce sufficiently to coat a spoon. I usually make the sauce earlier in the day to assure the consistency is right.
Set oven to broil. Place the broiler pan with skewers in on an upper rack. Set your timer for 10 minutes but watch the scallops during the process – your oven may be hotter than mine. Remove, flip the skewers and return to the broiler for 3-5 minutes – again, you want the bacon cooked but not burned.
While the scallops are broiling, ladle your sauce onto the plate as shown above. When the scallops emerge from the oven, remove them and set onto the plate. At this point, I pour Spence and I a glass of Prosecco which we enjoy with our plated Scallops Chambord.
Chef’s Note: If you can’t find black raspberry preserves, a perfectly good substitute is seedless red raspberry preserves.
From my travels to Switzerland, when my cousin Kristin took Spence and I to an “underground” fondue restaurant. “Underground” in the sense that this is a place that locals know of but not “tourists” (as we learned from our tablemates later that evening). Kristin and her husband had lived in neighboring Versoix for a number of years and so she quickly established her credibility. In reality the restaurant sat on a pier, a long stroll out onto Lake Geneva. Kristin placed our order at a walk-up station outside the restaurant. We carried our drinks inside and found seats at one of the long communal dining tables, very rustic. When your number was called you needed to react immediately as the servers were moving rapidly with vats of molten fondue. The fondue was served with bread and a side dish of fruit cocktail. The two men seated next to us (locals) began engaging us in a spirited discussion after dinner including an explanation about Traditional Swiss Fondue and what does (and doesn’t) go into it. There is so much more to the story of that evening and memories of that trip. But since this blog is meant to feature a recipe, I’ll save those stories for another blog or my novel…….
Kristin and I waiting on the fondue to arrive.
Spence also waiting.
Traditional Cheese Fondue
1 lb of Gruyère
1 lb Emmentaler
1-2 cloves garlic
2 t grated nutmeg
Dry white wine
Kirschwasser liqueur
Shred the Gruyère and Emmentaler cheeses, I do so in my food processor. This will yield 8 cups of shredded cheese. Using a microplane, grate two teaspoons of nutmeg, set aside. Using a garlic press, pulverize the garlic cloves, set aside.
I use an electric fondue pot but have also made this on the stovetop, transferring into an old-school fondue pot with a little can of sterno blazing beneath it. That said, when you are ready to assemble, heat the pot – better low and slow than to risk burning this fabulous cheese mix. Start by pouring in 1/2 cup of wine and the garlic into the fondue pot. As soon as it starts bubbling put in the first two big handfuls of cheese and stir with a fondue fork. Now stir in the nutmeg. By handfuls add the cheese, stirring the unmelted into the melted. Add more wine if needed. At this point add the Kirschwasser. How much is up to you – I use a healthy shotglass full. Stir it in. Serve with wine or beer of your choosing, ready your fondue fork and start dipping, relax and talk with your tablemates.
1 package ramen noodles – broken up, (discard the flavoring package – not needed)
1/2 c slivered almonds
1/4 c sesame seeds
1 stick butter
Melt butter in a large frying pan. Add noodles, almonds and sesame seeds, lightly brown them. Set aside to cool.
The topping is pure crunchy, buttery goodness!
For the dressing:
1/2 c sugar
1/3 c champagne vinegar
1/2 c canola oil
1 T soy sauce
1/2 t sea salt
1/2 t red pepper flakes
Mix together well and set aside. (I put it in a jar and shake it to dissolve the sugar and emulsify) You’ll dress the salad just prior to serving.
The dressing in a jar!
For the salad:
1 head Napa Cabbage – shredded (I don’t use the last two inches of the base and eliminate some of the stalk like center of the larger leaves)
1 bunch green onions – chopped
1/2 c finely chopped sweet red pepper
1/4 c finely chopped carrot
1/4 c finely minced parsley
Toss all salad ingredients together and refrigerate until ready to serve.
IMPORTANT: Do not dress the salad until just before serving.
The salad, assembled but not yet dressed.
When ready to serve, pour dressing over the salad mix (you will not need all the dressing – you can always add more) to lightly coat and toss together. Top generously with the crunchy ramen topping and serve. Enjoy!
For an easy side-dish, great for entertaining, try my new favorite potato dish.
Oven-Roasted Smashed Potatoes with Gremolata serves 4-6
1 dozen new potatoes (you could also use redskin potatoes)
4 cloves of garlic, whole & peeled
sea salt
cracked black pepper
olive oil
Fill a large pot with water and 2-3 heaping tablespoons of sea salt, bring to a boil. Add the potatoes and reduce heat to medium. Cook until tender – use a sharp knife to test. Drain and cool them for 5 minutes.
Line a large baking pan with aluminum foil, drizzle with olive oil. On a cutting board, place each potato under a spatula (or lunch plate would work), I use a heavy meat tenderizer from Williams Sonoma. Press down with even pressure – gently – smashing but not pulverizing.
My heavy-duty potato smasher.
Place each smashed potato on the foil-lined baking sheet.
Drizzle the potatoes generously with olive oil, sprinkle sea salt and black pepper over them. (I also put the garlic cloves that boiled with the potatoes on the sheet pan)
Heat oven to 450 degrees. Bake the potatoes for 18-20 minutes, remove, flip each one. Drizzle with more olive oil, sea salt and pepper. Bake for another 18-20 minutes. Remove the pan from oven, turn off heat. Top the potatoes with Gremolata (see recipe below) and place the pan back in the oven for 5 minutes and serve.
Enjoy!
Gremolata
Zest from 1 orange, 1 lemon and 1 lime
1-2 garlic cloves minced
1 t sea salt
1 t coarse black pepper
red pepper flakes (to taste)
1/2-3/4 cup chopped parsley
I use a mezzaluna given to me by my lifelong BFF, to chop the parsley and garlic, having first place the citrus zest, salt and pepper under the parsley and garlic. Cover until ready to serve.
I made quite possibly the most unusual dish in my culinary journey for last night’s dinner. Let me recap how this came about. About 30 years ago, I traveled to Aruba with my stepbrother, meeting my dad and stepmom who were enjoying the winter at their timeshare. I’ve always wanted to return for a romantic adventure and just last week, Spence and I committed to a 2015 autumn vacation in Aruba. This week I’m visiting my stepmom and shared my travel plans soon after my arrival. Excited, we started talking about the food (not shocking for those who know me – a big factor in my travels) and she mentioned the Aruban dish, Keshi Yena. By the vacant look in my eyes, she clearly deduced that I’d never heard of this. She described it, I was intrigued. The following morning, I’d culled a number of Pinterest recipes and reviewed them with her. There were variances but we settled on one was closest to her memories, headed to the grocery store and made it last night. Can I just say here, OMG! It was AMAZING. Full of flavors, none overpowering just complimenting each other. I dreamt about it, I awoke thinking about it. And when I go to Aruba, of course, I will seek it out. The history relating to the origin of this dish is quite fascinating and I’ll share it following the recipe:
KESHI YENA
2 cups cooked chicken, cut into small pieces (I highly recommend a rotisserie chicken – light & dark meat, easily obtained in today’s world at most supermarkets. It truly amps up the flavor!)
1 lb Gouda cheese, sliced
1 large onion, chopped
4 Tbsp butter
1 large tomato, chopped
2 cornichons, minced (small dill pickles)
1 large green pepper, chopped 8 green olives, sliced (about 1 1/2 Tbsp)
1 clove garlic, minced
1/4 – 1/2 c golden raisins
1 Tbsp yellow mustard
1/2 c ketchup
1/2 tsp Worcestershire sauce
1 c cashews, chopped/ground – use a food processor – if not, chop very fine
Step One: In a skillet, saute the onions and garlic in butter until they are softened. While that’s happening, prep the other ingredients – except for the gouda – in a large bowl and gently mix together.
Step Two: Add the meat mixture to the skillet and using two wooden spoons, incorporate the onion and garlic butter into it. Let this simmer on a low heat, stirring occasionally for about 5 minutes. Fold the vegetable mixture into the chicken and simmer for 20-30 minutes. Turn off heat and let it cool for about 30 minutes.
Step Three: I used a medium size, 2 inch deep oval casserole – square is fine – but deep is necessary. Butter the casserole or baking dish. Slicing your gouda, begin by placing a layer in the bottom of the dish – think “puzzle”, cover the bottom completely.
Step Four: Start ladling about half the meat mixture over the cheese “puzzle” in the bottom of the dish and cover completely. Now going around the entire rim of the dish, place slices of gouda along the inside perimeter of the dish, creating a two inch high “rim” of cheese around the edge of the meat mixture. (remember, it’s called Chicken Stuffed Cheese, you’re building up the cheese to surround the meat.)
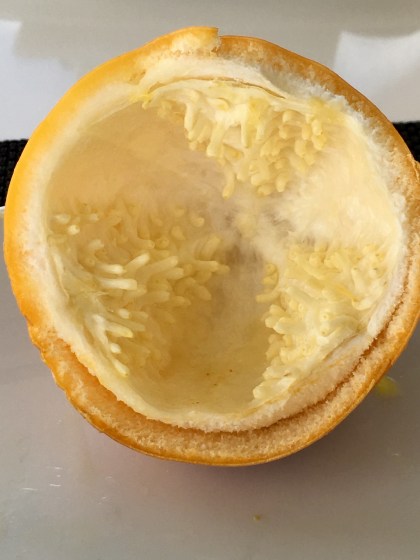
Step Five: Add the remaining meat and complete the cheese “puzzle” on top of the casserole covering the entire top. It will look like this:
Notice the cheese rim along the inside edges…..
Bake at 325 degrees for 45 – 50 minutes. After removing from the oven, let it rest a minimum of 5 minutes before serving.
Just out of the oven, the aroma is tantalizing…it takes will power to wait those 5 minutes.
We served this in a bowl with a glass of Pinot Grigio which was the perfect pairing.
Here’s a bit of history that I found while researching the recipe, (source Huffington Post). When it came to the table, the Dutch liked their Gouda cheese, and their Edam cheese — both of them shipped to Curaçao in round formats. The Dutch “masters” couldn’t be bothered with the rind of these cheeses, so the milky-creamy part at the center of the cheese got scooped out and consumed; the hollowed-out cheese shells were returned to the kitchen as refuse. Often, the slave is wiser than the master; they certainly were in this case. The kitchen workers noticed other foods coming back from the dining room — such as pieces of chicken and other meats, left over from stews. It was a logical leap from there: Season the meats, add something a little sweet (like raisins), add some favorite island ingredients (today, olives are common), stuff the cheese shells with the meat mixture, and steam the stuffed cheeses gently in a bain-marie for a few hours. The result is a perfect marriage of cultures: the stolid creaminess of the North meets the lively spiciness of the South.
Within the last two years, a former co-worker turned our little band of foodies on to baked oatmeal, a concept we’d known nothing about but that has since been showing up everywhere. The variations are endless and delicious and it’s a great way to start the day making enough for a quick breakfast for the rest of the week.
I hadn’t made it for a while yet it’s been on my mind, especially during these cold winter mornings. So today, culling a myriad of suggestions from Pinterest and other sources, then surveying my ample pantry and freezer ingredients to see what I had available, I came up with this delicious recipe of my own. Enjoy!
Raspberry Walnut Baked Oatmeal serves 6
2 cups old-fashioned whole grain oatmeal
1 1/2 teaspoon cinnamon
1 1/4 teaspoon baking powder
2/3 cup light brown sugar packed
1 teaspoon sea salt
Mix dry ingredients together, set aside. Preheat oven to 350 degrees. Butter an 8×8 baking dish. In a separate bowl mix together:
1/3 cup melted butter
2/3 cup milk
1 egg
1 1/2 teaspoon vanilla
Add to dry ingredients. Fold in:
1 2/3 cup fresh or frozen raspberries
2/3 cup coarse chopped walnuts
Pour into baking dish. Bake for 40 minutes. Allow to cool for 5-10 minutes. Serve with or without milk.
Before baking
Fully baked, cooling and smelling insanely delicious!
Chef’s note: you can substitute blueberries, strawberries, dates, dried apricots, pecans, almonds, almond or soy milk – you get it. It is the ultimate easy way to use what you have on hand, what’s seasonal and what sounds good.